Digilabel Management
1. Create new Digital Label
Click on ‘Digital Labels’ in the left-hand navigation menu which should take you to this page.

Here, click ‘Add Digilabel’ either in the left hand menu or at the top of the page.
2. Add Titles and Intro
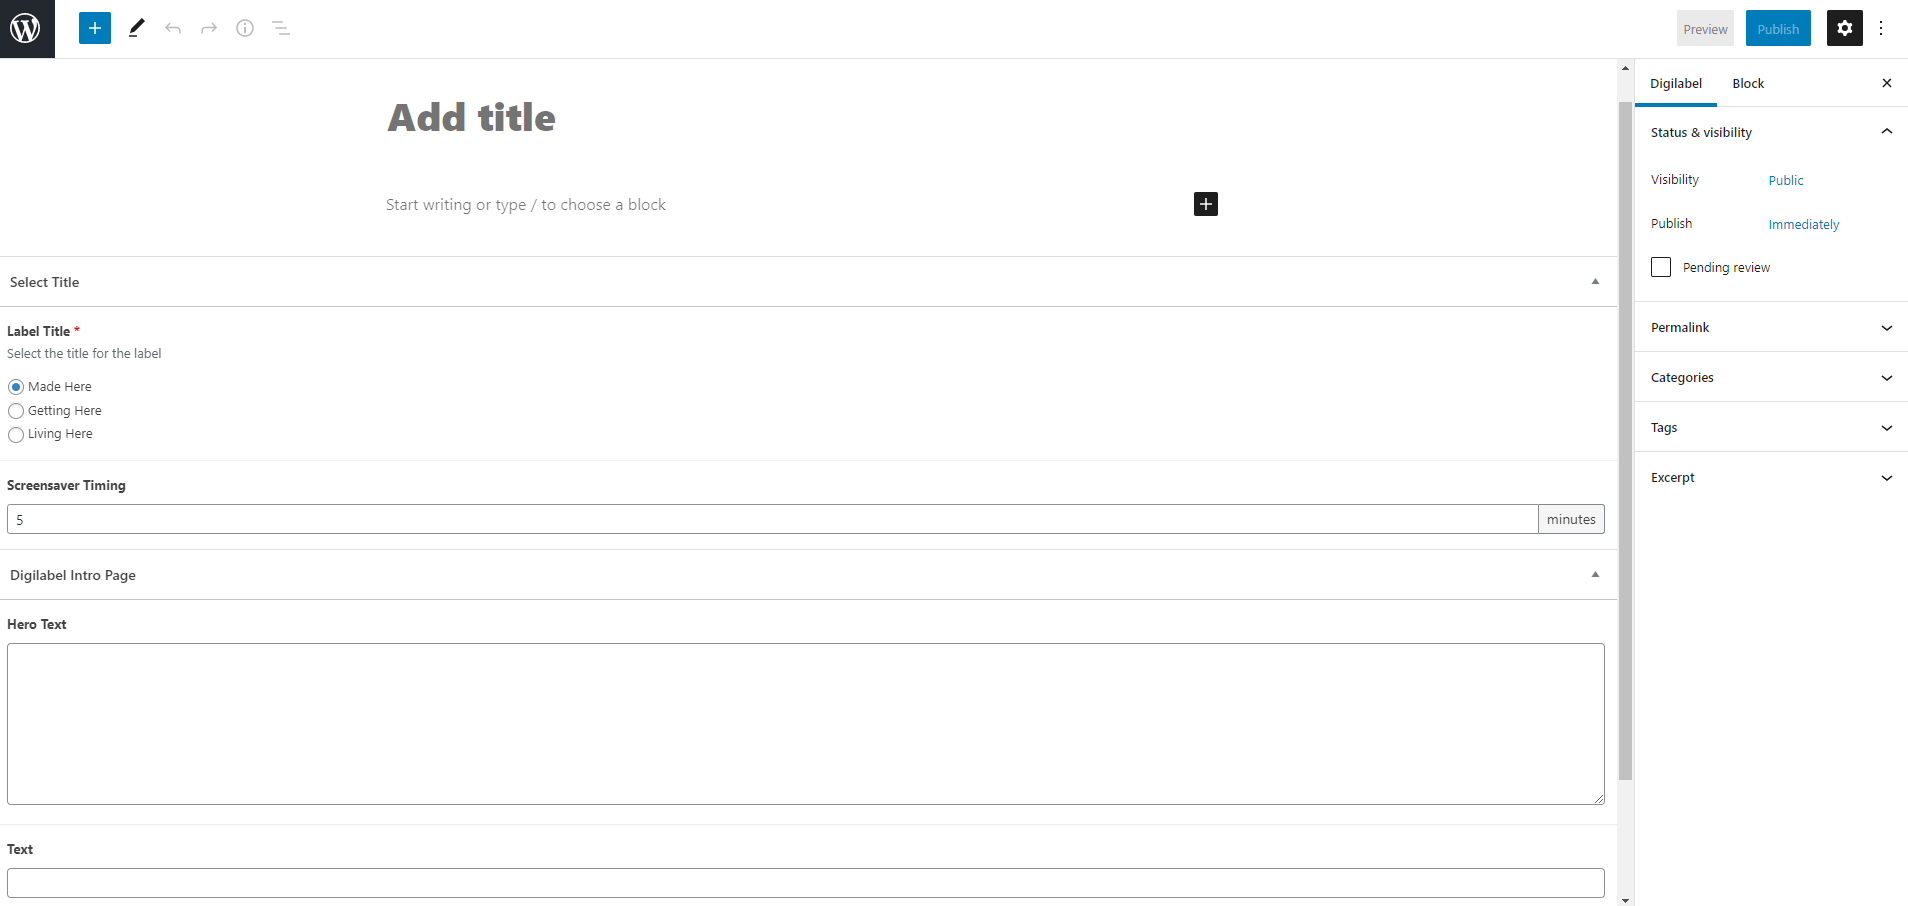
- Add a title at the top where it says ‘Add Title’ for the new Digital Label that will make it instantly recognisable to users who will be creating the Digital Labels. NOTE: this will be not be visible to Museum guests.
- To select a title that will be shown to museum guests, please select below from:
- Made Here
- Getting Here
- Living Here
- Select a number of minutes for which the screensaver will begin if the digilabel is idle. The default is 5 minutes.
- Input the hero text and additional text that will appear on the intro page after the instructions have been skipped by users.
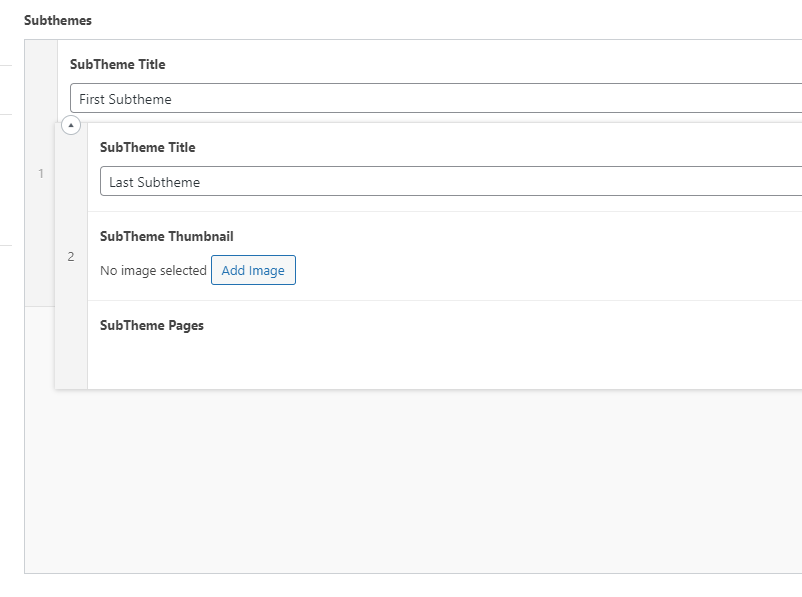
3. Add Subtheme
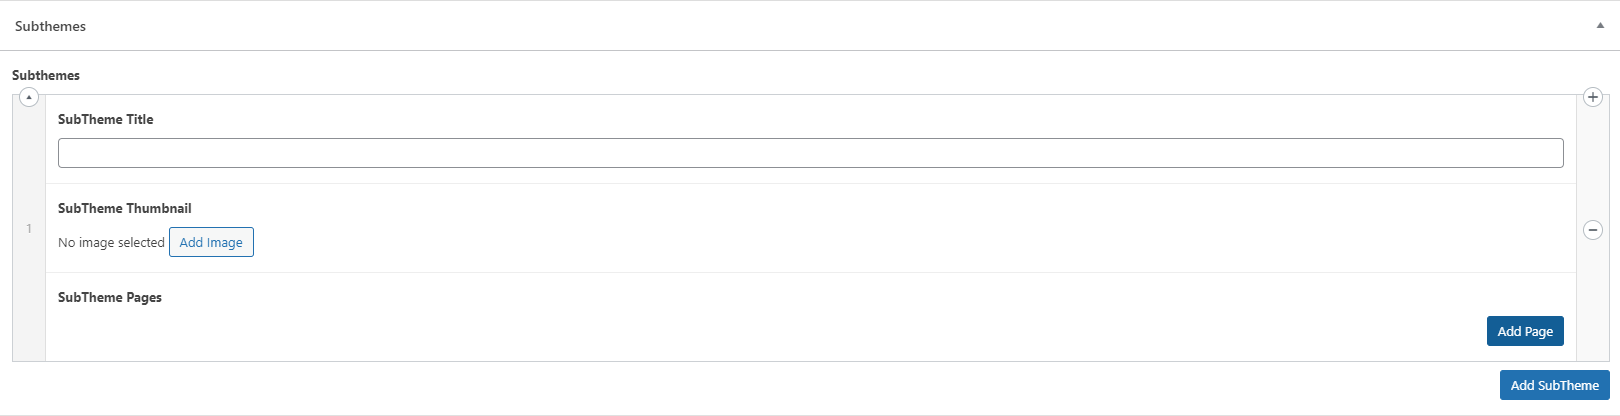
In the bottom right-hand corner of the page, (you may need to scroll) click the ‘Add Subtheme’ button.

This will give you several options for your sub theme, such as the ‘title’, the ‘thumbnail image’ and to add pages. NOTE: the thumbnail image will not be used on the subtheme page, just on the subtheme selection page.
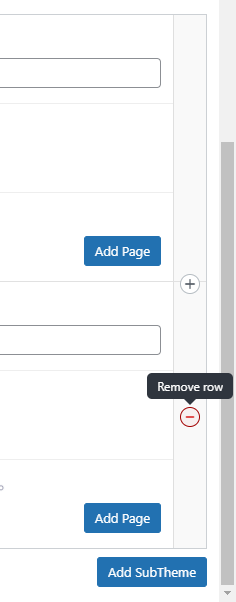
If you wish to remove a subtheme, you may do so by clicking the minus symbol on the right hand side of each subtheme and confirm removal.
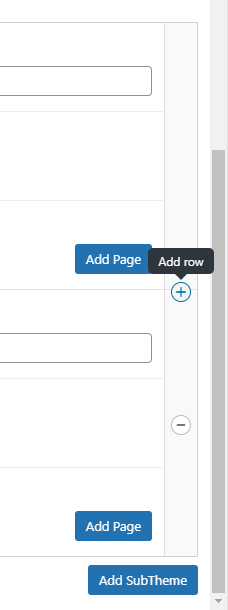
You can alternatively add a subtheme in between two others by clicking the plus symbol on the right-hand side and at the top of the subtheme. In the example below, this would add the new subtheme in between the first and second subtheme, where the plus symbol is located.
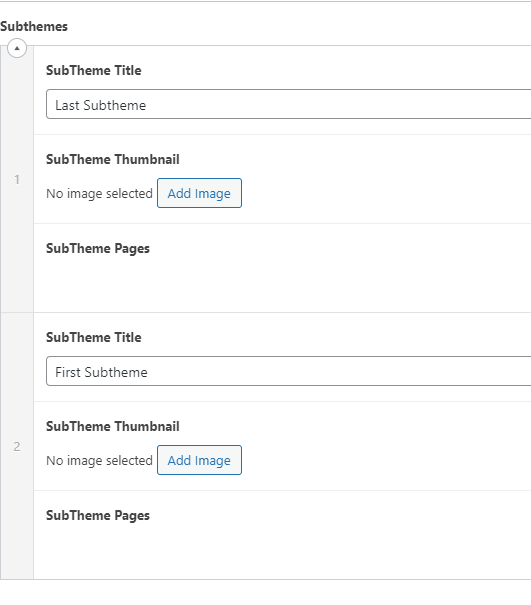
You can also reorder your Subthemes by clicking and holding the left-hand side of the subtheme where the number is and dragging them to where you would like them to be.
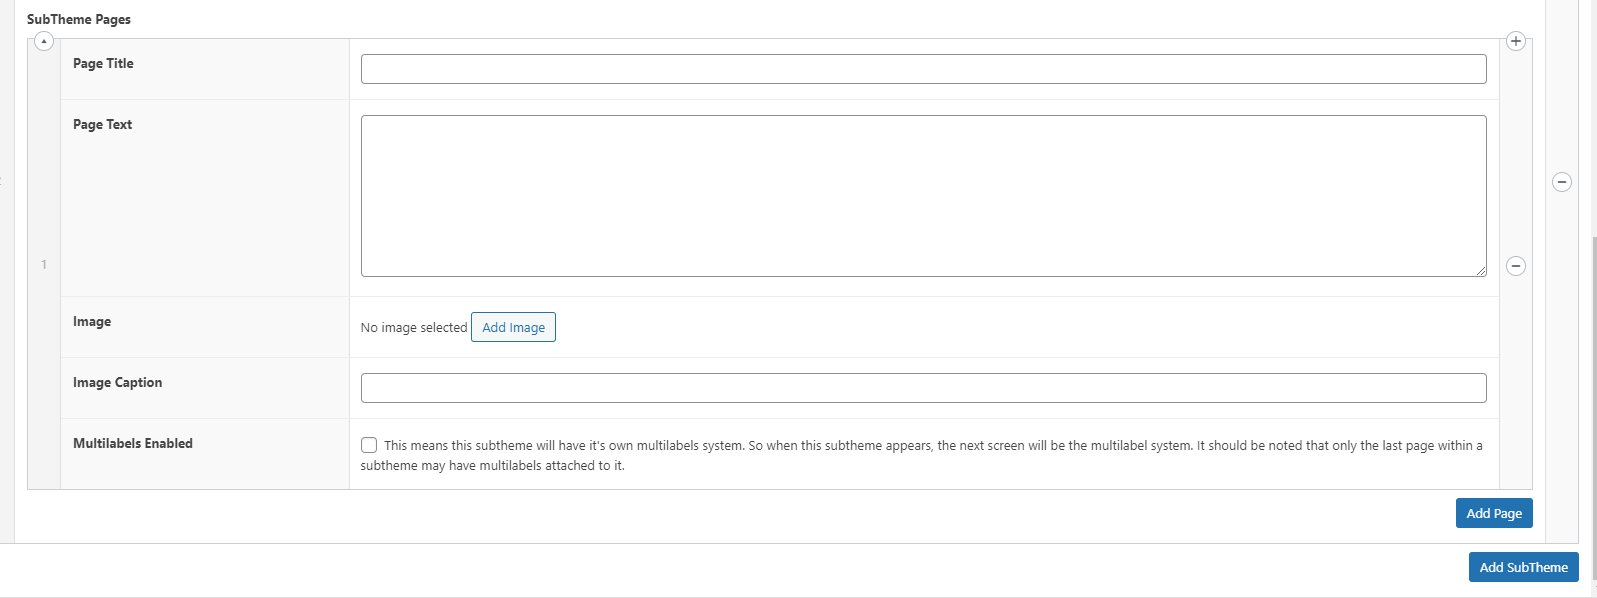
4. Add Pages
In the bottom right-hand corner of each subtheme there is an ‘Add Page’ button. Here you can add as many pages as you like to each subtheme. For each page you can add:
- Page Title
- Page Text
- Image – will appear on the right-hand side of the digilabel
- An Image caption
- Multilabels enabled
- this will allow you to create a page of objects. NOTE: these will only show in the Digilabel if this option is selected on the final page of the subtheme.
If you would like to remove or reorder the pages you may do so by using the same methods as outlined in section 3. Add Subthemes.
5. Add Objects
If the ‘Multilabels Enabled’ checkbox has been enabled then you may create any number of objects. To add an object, click add object in the bottom right-hand corner of the final page.
For each object you may add a:
- Title
- Description
- Image
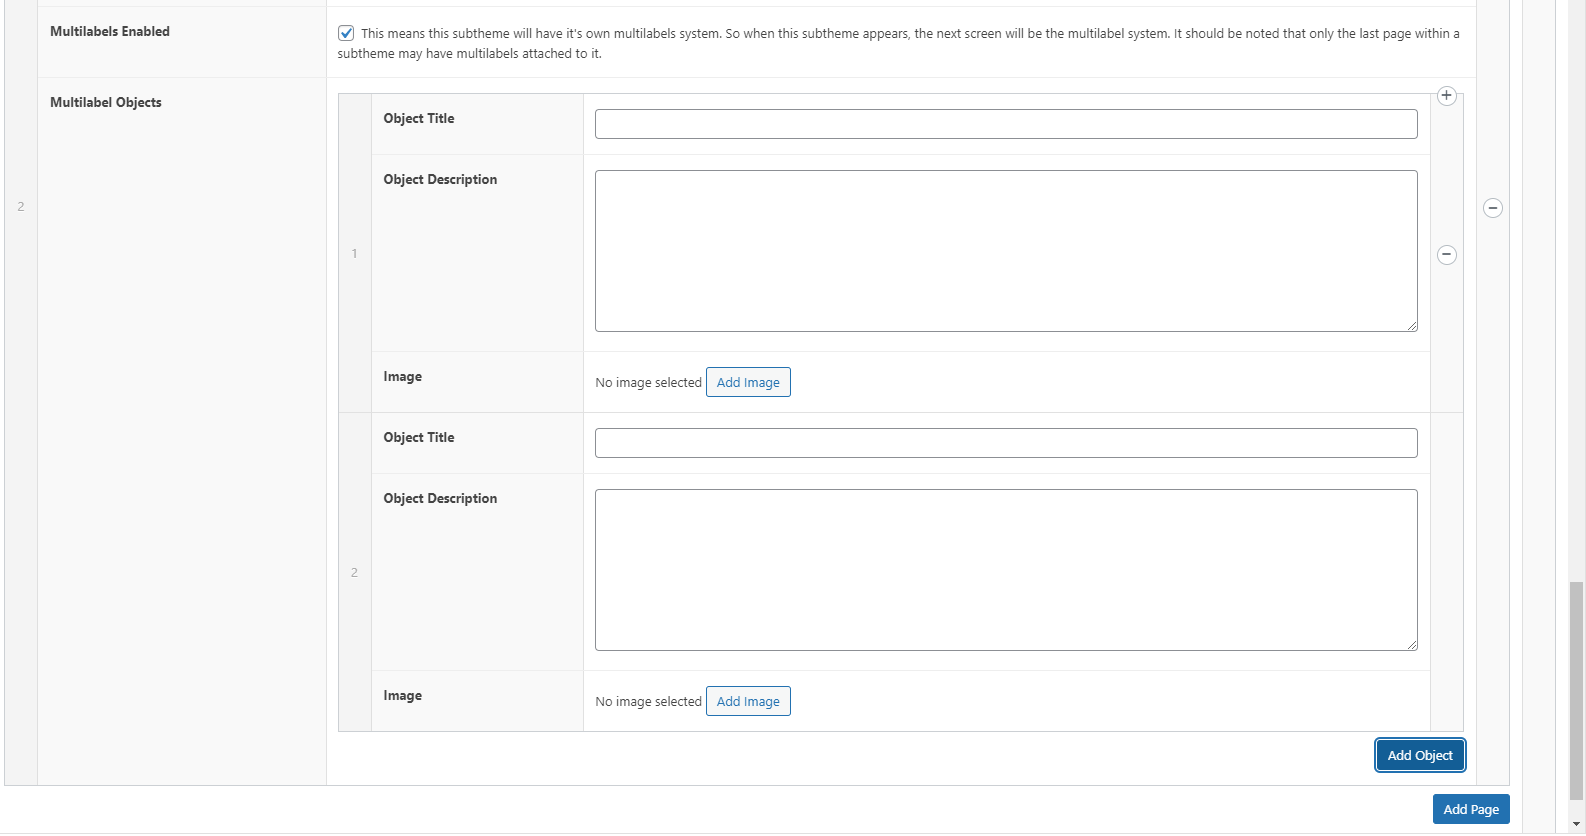
You may also remove, add and reorder the objects using the similar methods as outlined in section 3. Add Subthemes
6. Preview Digilabel
Once you have added all Subthemes, Pages and Objects, you are ready to Publish your Digilabel. You may want to preview how the Digilabel will appear before publishing.
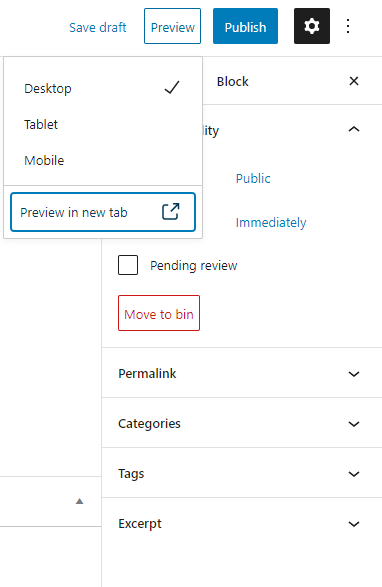
To preview the Digilabel, in the top right-hand corner you will see the word Preview next to the Publish button. Click here and it will show a drop-down menu.
Leave the selected option as desktop. (by changing it you will only change the format of the editor, NOT the Digilabel preview).
Click ‘Preview in new tab’ at the bottom and this will take you to the Digilabel preview in another tab
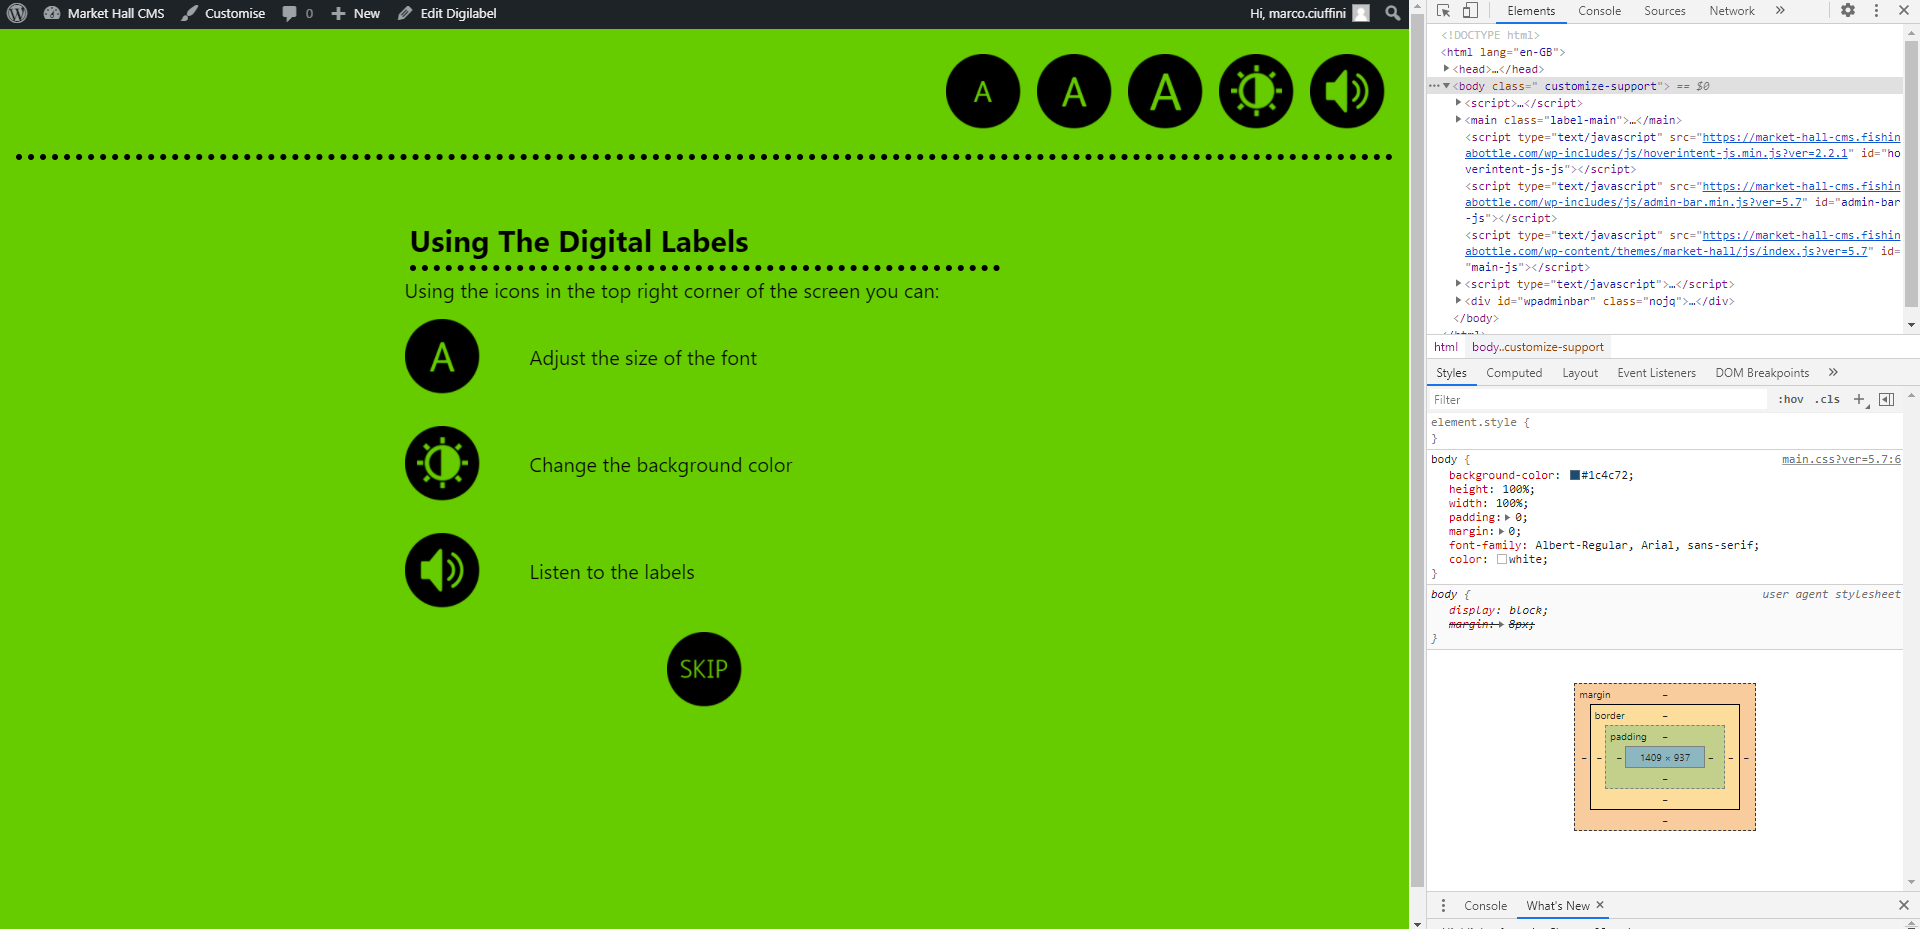
Once the new tab has opened you should see a green screen with an intro page. To preview the page as it will look on the tablet you can view the desktop browser in tablet mode.
To do this, first press F12. This will bring up chromes’ ‘devtools’ and the page should now look something like this.
At the top of the devtools on the right-hand side of the page there is a header with several icons and tabs. To view the screen in tablet mode click the icon that looks like a smartphone in front of a tablet. Once selected this will be highlighted in blue as shown below on the left-hand side of the header.

Now that the screen is in tablet mode, you will need to ensure that the dimensions of the tablet match closely to the tablet in the museum. To do this, in the middle of the screen at the top, there is another header containing a drop-down menu, two inputs containing numbers, a percentage, another drop-down menu and a ‘rotate device’ icon.
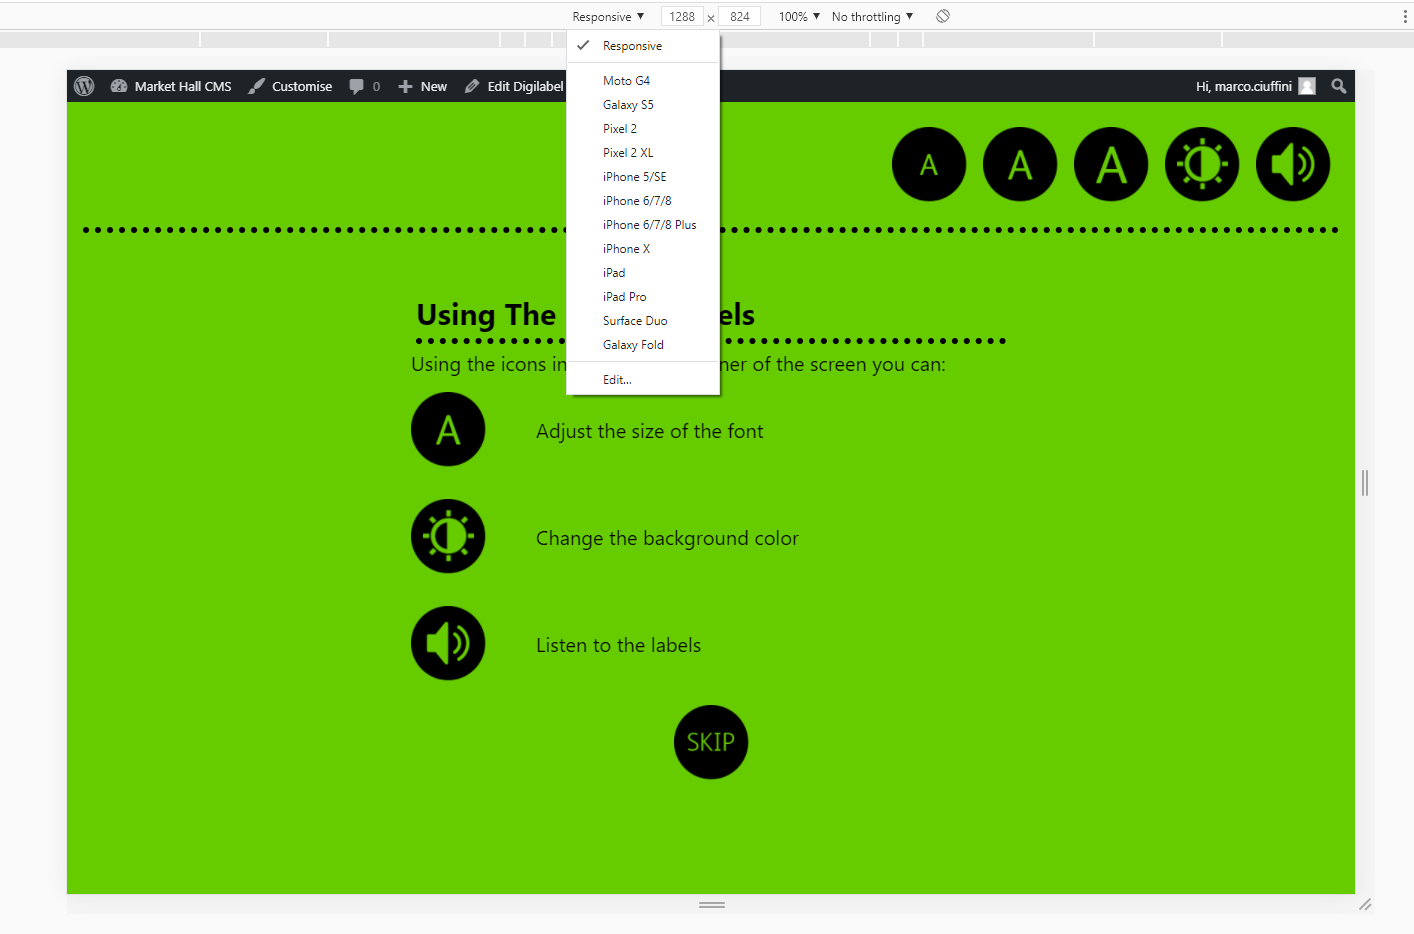
To set the Digilabel to how it will appear in the museum you will need to:
- Set the first dropdown menu to ‘Responsive’.
- Set the inputs to the resolution of the screens in the museum. (a good size for the smaller screens is 1500 x 900).
This will now give a good preview of the what the labels will look like in the museum.
7. Publish Digilabel
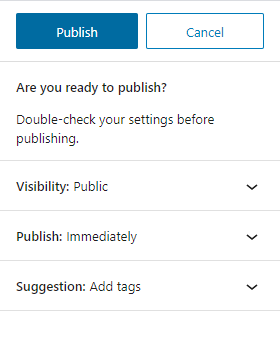
Once you have previewed the Digilabel in the browser and you are happy with it then you are ready to Publish. In the top right-hand corner next to the Preview button there is a Publish button. Just below, in the ‘Digilabel’ settings there is a checkbox ‘Pending review’ that can be clicked, if you wish, for the Digilabel to be reviewed by an admin.
Once you have clicked ‘Publish’ it will show you a confirm screen with some pre-publish checks. Here you can choose a time for your post to be published or add any tags to the post which may help you search for Digilabels in the main Digilabels screen.

Once you are happy, click ‘Publish’ again. To add it to a screen in the museum please follow the instructions in the Assign to a Screen page.