Assigning an interactive or a label type to a screen
1. Navigate to a Screen
Click on ‘Screens’ in the left hand navigation menu which will take you to this page
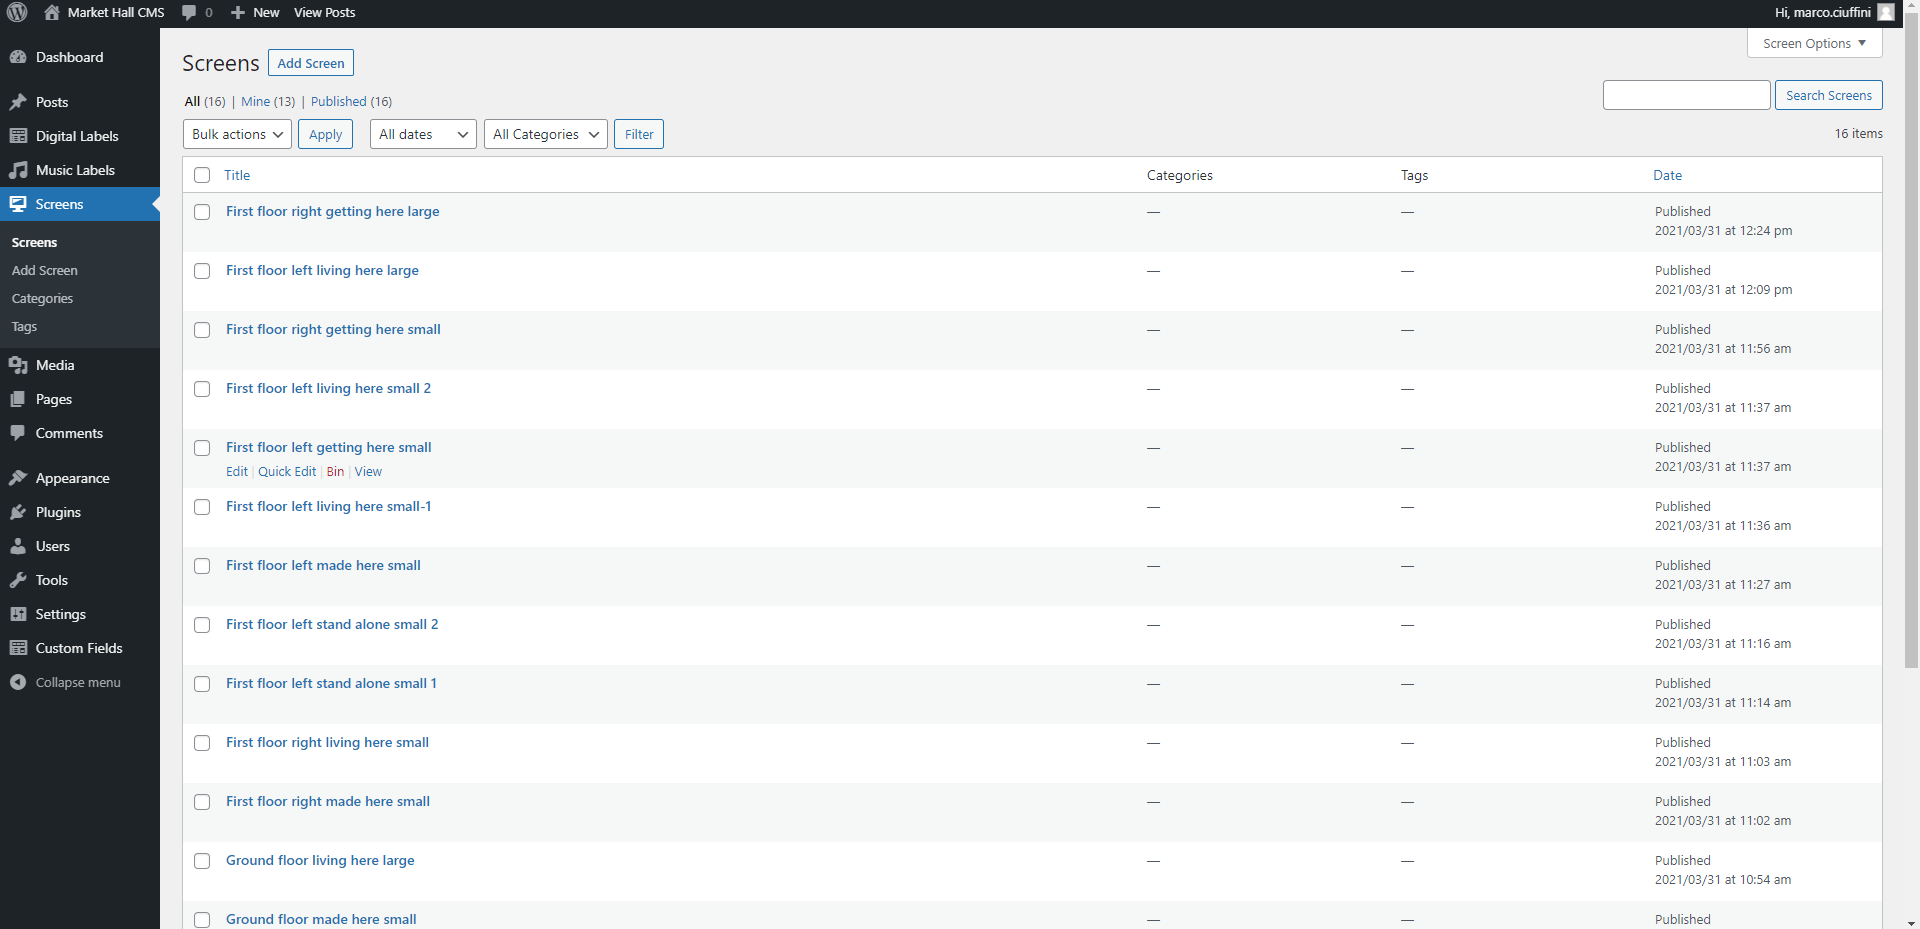
Here is a list of all of the screens in the museum. In this image, the titles have been named by FIAB but they may be subject to change.
Find the screen you are looking to edit and click the title or the edit button that will appear underneath when you hover over the title.
2. Screen Info
In the screen chosen you will see a page similar to this one.
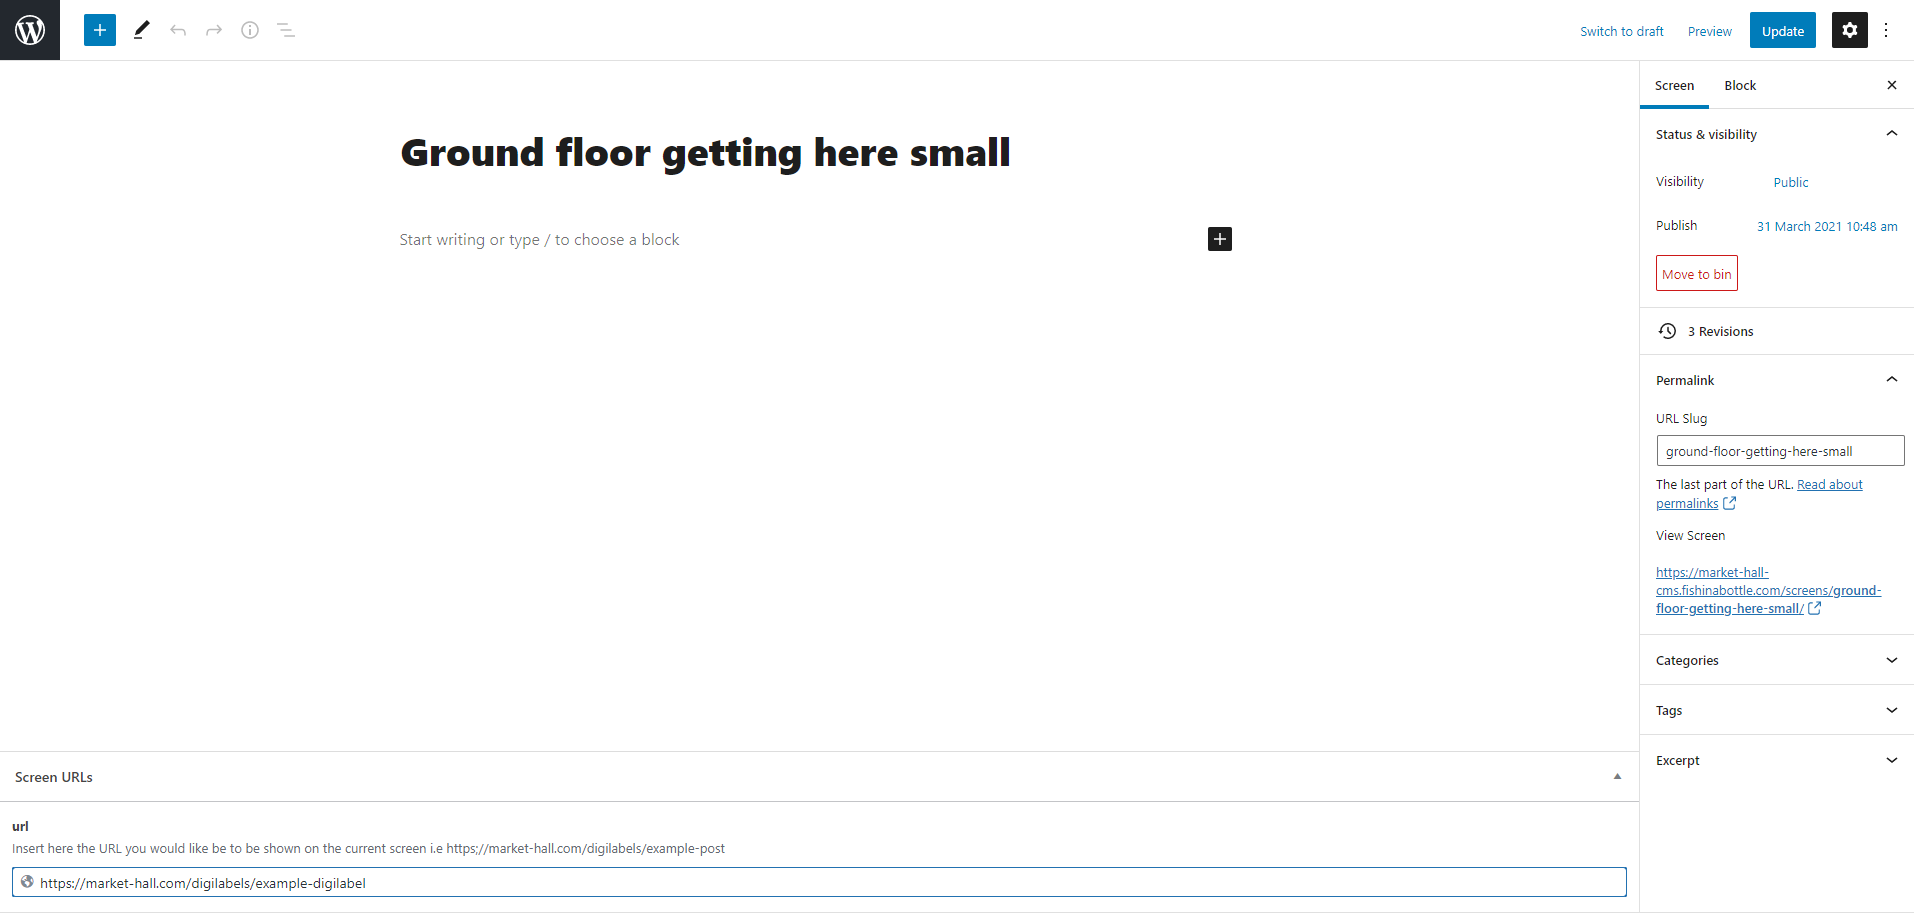
Here you should see the title and at the bottom of the page a section entitled ‘Screen URLs’. You may change the title to whatever you decide to help the curators understand which tablet this ‘screen’ is referring to.
You may also write underneath where it says ‘Start writing or type / to choose a block’ anything that also helps you locate the tablet such as ‘This is the tablet on the first floor on the right hand side located close to the bees’. This will only be visible to curators.
In the panel on the right hand side there is a field entitled URL slug. DO NOT edit this. This is how FIAB identifies which url the tablet should point to. If this has been edited please notify FIAB.
3. Assign URL to screen
As stated above, at the bottom of the screen page there is a field entitled ‘url’ underneath the ‘Screen URL’s’ section.
Here is where you can enter the URL that you would like the tablet to show in the museum. It will most likely contain the start https://market-hall.com/
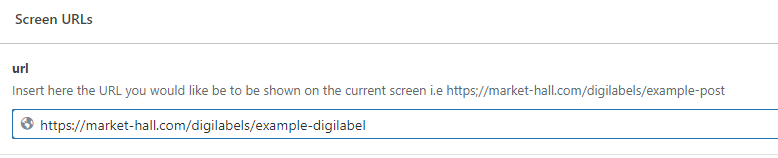
It is required to contain a URL and the screen cannot be published/updated if the field contains an invalid URL, however it can be published updated with an empty URL.
Because of this, the URL must contain the https:// at the beginning. It may or may not contain www. after the https://
4. Preview Screen
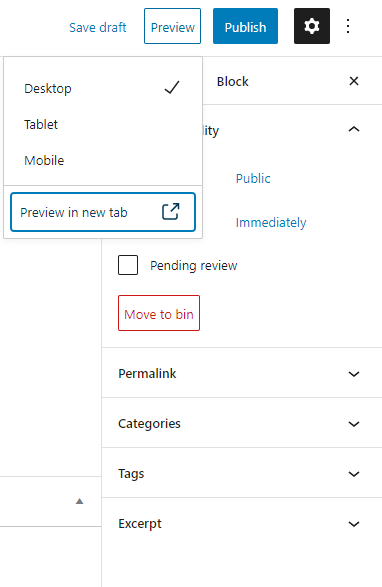
Once you have entered the URL, you’re ready to publish. Before that you may want to preview to ensure that the screen is receiving the correct URL.
In the top right-hand corner you will see the word preview next to the publish button. Click here and it will show a drop down menu.
Leave the selected option as desktop. (by changing it you will only change the format of the editor, NOT the music label preview).
Click ‘Preview in new tab’ at the bottom and this will take you to the screen preview in another tab.
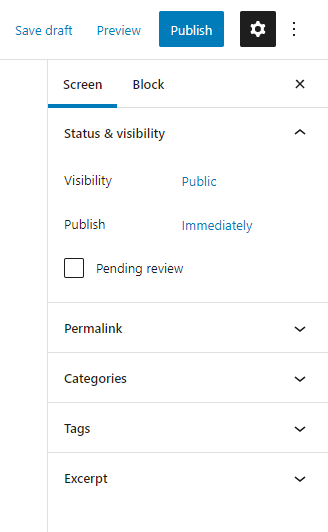
5. Publish Screen
Once you are happy that the screen is receiving and presenting the correct URL then you are ready to Publish. In the top right hand corner next to the preview button there is a publish button. Just below in the ‘Screen’ settings there is a checkbox ‘Pending review’ that can be clicked if you wish for the screen to be reviewed by an admin. This is not necessary though.
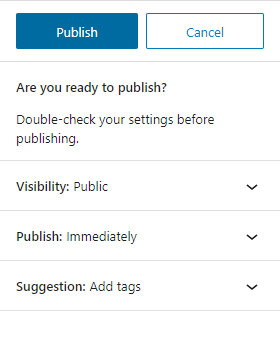
Once you have clicked ‘Publish’ it will show you a confirm screen with some pre-publish checks. Here you can choose a time for your post to be published or add any tags to the post which may help you search for screens in the main screens page.
The tablet in the museum will now show the label or experience that you have set to it.